Showing posts with label Recycle Reuse Redesign Project. Show all posts

Monday, June 14, 2010

The Recycle, Reuse, Redesign Project: 5 Minute Crafts

I'm still in the: What to do with my old/broken jewelry? phase of this project. I'm also a little lazy right now. I'm on day three of seven days straight of working, and today I had to be at work by 6:30am. Needless to say, I'm a little tight on time and a little tired.

I think some people get turned off by crafts because they think crafts take forever and that they don't have the time. But when it comes to recycled crafts, a lot of the time everything you need is right in front of you, already made, it just has to be assembled correctly.

So, get out your old jewelry, ignore my grainy photos and be prepared to do 5 minute crafts.

Craft One: Table Decoration
You need: Old jewelry, a glass/vase/etc.

Take jewelry:
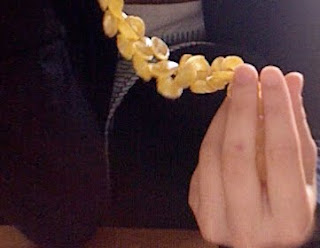

Put it in the container of your choice:


I suggest maybe using something a little more upscale than an old wine glass. It was all I had lying around though.


Craft two: Pin
You need: A safety pin, an old pendant from a piece of jewelry, a piece of clothing

Take the pendant:
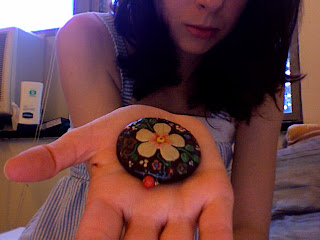


Pin it to a shirt/whatever:


I think sometimes we just give up on broken things, but really, most broken things can be reused. It takes a little bit of thinking outside of the box, but you can usually reuse your old things. And it doesn't need to take hours, or an hour... sometimes, creating something new out of the old can take 5 minutes.

Friday, June 11, 2010

Recycle, Reuse, Redesign Project: Necklace

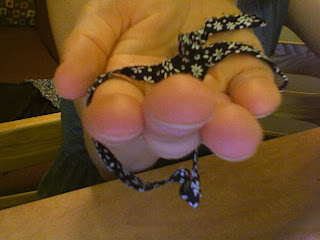
So today I made a necklace out of beads:

And out of the scraps of an old dress that I'm in the process of altering:


It was super easy, I just put the beads in an tied a knot after each one to hold them in place. It took maybe all of five minutes. The beads were from a broken necklace, and it was a good way to reuse some old beads and a tiny bit of extra fabric.

This is the finished product:


The question I have for the people out there who are maybe a little better at fashion than I am is do you think that the colors clash too much? How about the patterns? All in all though, it's a simple project and a good way to reuse broken jewelry!

Wednesday, June 9, 2010

The Recycle, Reuse, Redesign Project: Paper Trees

I can't tell you how much I'm loving my new project. As mentioned in my previous post, I'm back in my hometown for a bit. My room here is a plethora of old shit that needs to be upcycled and redesigned.

Some of those projects are going to take a little longer, and I'm only home for so many days, so it looks like I'll be taking things back upstate. Today it was rainy and gross, and after a lunch with some family members and before dinner with some other family members, I decided to sit on the couch, watch stupid TV, and create a project out of some of my parents' old magazines.

I decided to make a tree, inspired by a post I found on Ravelry.com that lead me to this (amazing) tree with magazine paper for leaves. Apparently, the post was originally from a blog called Simply Modern Mom, and the writer put the pictures of the tree in her bedroom. Hers are way more "adult" looking than mine, but I figure it's okay, since I'm only 20. This is a picture of her paper tree:

For my tree, I grabbed a stack of magazines and some glue, as well as a blue piece of paper. I didn't have paints or a canvas, so I had to make the tree trunk out of paper as well, which is how my tree differs from Simply Modern Mom's. Also, I used a collage style, opposed to making the tree leaves all one pattern.

It was a slow process, and I definitely recommend outlining your design first. This makes visualizing cutting pieces much easier.
Here's my finished product:

I scanned it in, so you can kiiiiind of see my pencil lines. I notice that when I look at other people's crafts blogs, their stuff is flawless. And so far my projects have been flawed in some way. But, it's a learning process. So to all new crafters out there, practice makes perfect, and I'm sure we'll get there eventually. =)

However, I am totally proud of myself that my tree looks like something out of an Eric Carle book!

Monday, June 7, 2010

The Recycle, Reuse, Redesign Project: Paper Baskets

Sometimes, when I make crafts, I wing things and then I rush things and then they look sort of shitty. This is what happened last night. I wanted to use an old issue of Cosmo to make a container to hold some of my beauty products that I just leave sprawled out on my dresser. I used a paper weaving technique that I found a version of on Ravelry.com. The author of My Recycled Bags Blog suggested that I check out Ravelry's from Trash to Treasures group for project ideas.

Poster Emily Blades posted a picture of something her daughter made on the forum there. Her d
aughter's basket is to the left. her daughter's basket is a lot better than mine, and also more basket-like.


Mine is sort of just a cylinder to hold my stuff. What I did was cut a magazine page in half, then fold one half into four sections to create a piece to use as a weave:


Now here's where I messed up. I didn't have any glue in my apartment, so I used staples, which makes things look shitty. Use glue. Please. So, glue (or staple if you must) two pieces together, these are going to create your horizontal pieces. Single pieces are for vertical pieces. Your first horizontal piece should be a circle. Start gluing the single/vertical pieces to the base circle, one in front of the circle one behind. Once you've gone all the way around, start weaving the horizontal pieces through, and attaching them with glue to create more circles.

It will probably look like a strange hat at some point:

Finish weaving until you get to a height you want, and cut off the excess. It will look something like this:

This is why you shouldn't staple:

You can see the staples, and they look unattractive. I rushed through the directions there, so if anyone needs a more detailed explanation, let me know.

Sunday, June 6, 2010

Recycle, Reuse, Redesign Project: Crocheting Flowers

Summer is a time to start new projects. Theoretically, you have more time (although I'm not sure if I do because I'm working and interning). Lately, every time I look in my closet or around my room I'm tired of all of my "stuff." I want new clothes, new jewelry, new decorations. But it's expensive and over-all wasteful to buy new stuff when I have perfectly good old stuff. So I've decided to start a little summer project:

1. I will recycle my old clothes/things by selling or trading them at buy/sell/trade places. Or I will donate them to places like the salvation army or various clothing drives. This will give me the opportunity to buy new things without having an excess of stuff.
2. I will reuse old clothes, old pieces of fabric, leftover yarn, and anything old in order to...
3. Redesign my old clothes, jewelry, etc. using things that I have reused.

For the past couple of months, I've been into crocheting. I made hats in the winter:

After my hat project, I had lots of leftover yarn. So I made a blanket out of the leftovers, creati
ng blocks and sewing them together.

The blanket took forever, and I had trouble coming up with a good picture of it, but it's a little bit smaller than a double bed, and it's goofy looking up I absolutely love it! And it's really warm in the winter.

But now summer is here and it's too hot to be wearing hats or lying under wool quilts. So I've moved on to crocheting flowers.

I've decided to use some of the tiiiiiny bits of leftover wool I have to make flowers. And they're
great for decorating--reusing and redesigning! This site has some great patterns for flowers. I suggest using them to make jewelry. I've seen some really great crocheted necklaces, and I still haven't attempted them yet. This necklace looks beautiful.

However, my favorite thing to do with the flowers is add them to clothing. You can pin them to clothes as either a way to add color or alter the garment. For this skirt I attached some different colored flowers to the side. It's a work skirt, and I have to wear black shirts at work and I end up look like I'm going to a funeral without the flowers on this skirt!


Another thing I tried was I had a dress that kept falling off of my shoulders. The dress is a weird cut... there's a little tie in the back but otherwise your back is bare. So I pinned the back and stuck a flower on it to make it look nicer and make it fit:


I'm super excited about redesigning my stuff. If anyone needs any crochet patterns for anything, let me know and maybe I can help you out!!